
Some notes for myself on using group policy as well as example policies and configurations.
Force refresh group policy and evaluate the results
From administrative command prompt (run → cmd & CTRL+SHIFT+OK):
gpupdate /force
gpresult /r
gpresult /r /scope:user
gpresult /r /scope:computer
View members of a security group
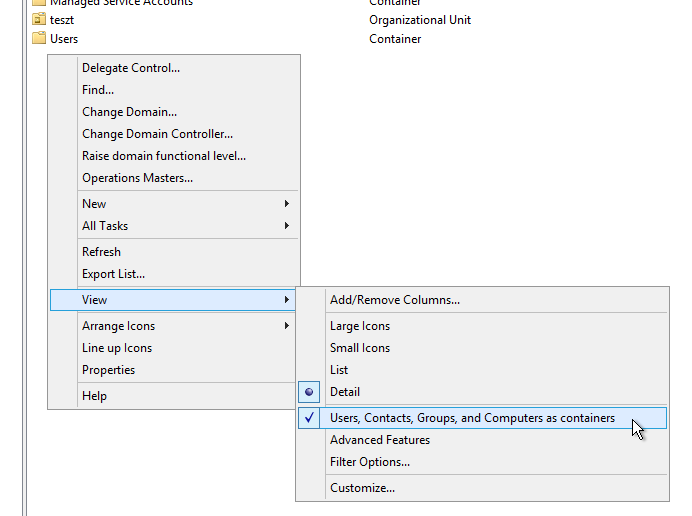
Open the Active Directory Users and Computers console and make sure that View → Users, Contacts, Groups and Computers as containers is checked:
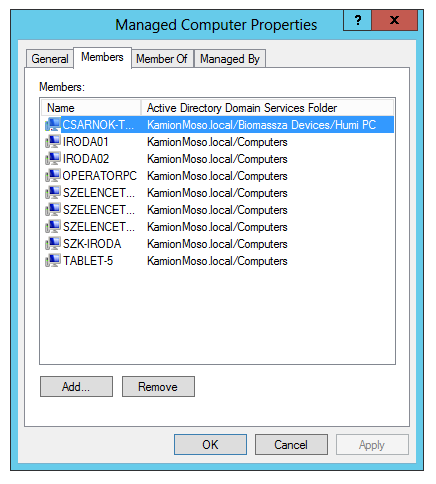
Then, you can right click the given group → Properties to see its members:
Recipes
Local Admin GPO
There are two methods for making users local admins on certain machines.
(1) Give local admin rights on all affected machines to a group of administrators
This first approach involves creating a "Restricted Groups" policy and then making use of filtering to only apply it to certain machines. This works well for making certain groups of users administrators on all affected machines. It does not work well if you wish to granually define who is an administrator on which machine, for example if you want each user to have administrator rights on their machine only.
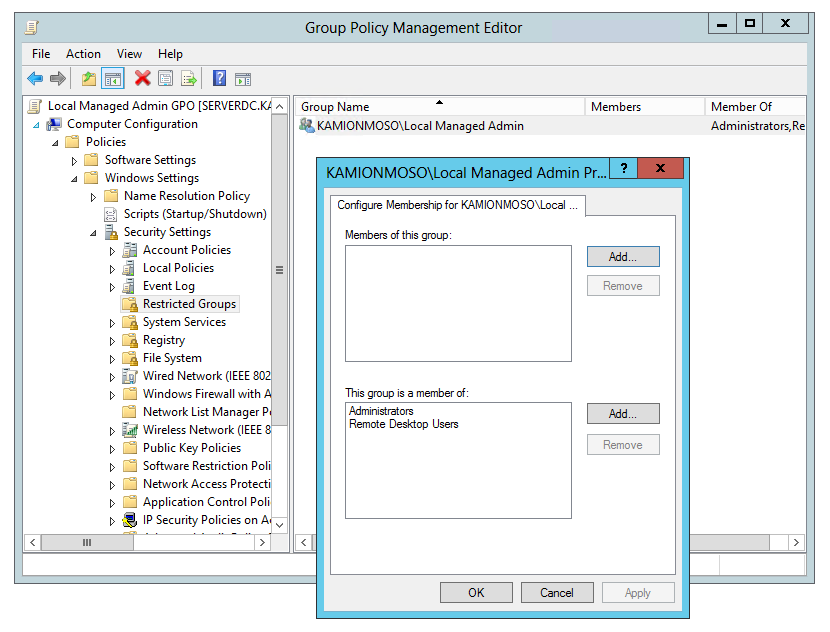
Computer Configuration → Windows Settings → Security Settings → Restricted Groups
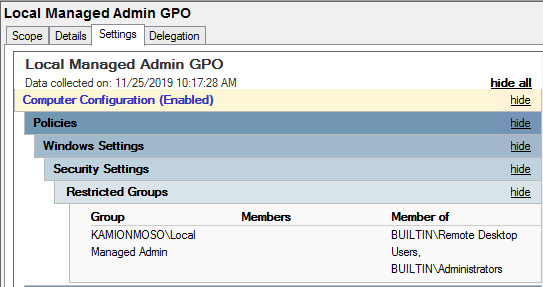
Important! When adding members, make sure to add to the "This group is a member of:" section since that is layered (whatever you set is "added to" whatever is already defined for the given group). If you add to the "Members of this group:" section, then anyone who isn't set there will be removed from the given local restricted group on the affected computers!
Since Group Polices were first introduced with Windows 2000 there was an setting called “Restricted Groups” which allows you to control the membership of a group. This option had two modes one called “Members” option which I also call the “Iron Fist” mode and the other “Members Of” option which is much gentler. The “Members” option removes any groups or users that are not explicitly specified and the “Members Of” option just adds a specific group which out removing any existing groups. The “Members” option was really good at cleaning up those rogue members of the local admin group but its was also really hard to setup as you had to have a new group policy every time you wanted a different list of members in local group on a computer. The “Members Of” option was a lot easier to maintain as you could layer multiple group policies on top of each other but this normally resulted in just adding another layer of group to the pile of groups that were already in the local administrators group. The other problem was the “Members” option would override the “Members Of” option so there was really no way of mixing the two modes.
From: How to use Group Policy Preferences to Secure Local Administrator Groups
(2) GPO + Give Local Admin rights to specific users to their machines only
Restricted groups work great. They work as designed and that is that. The problem is when your AD and your infrastructure and GPOs start growing it becomes a juggling game and more difficult to control the order of Restricted groups. This is because they are not cumulative, meaning that they don’t add to the current list. The last GPO with a Restricted Group setting applied, wins. The members of that group are used. Period.
Another issue is that anyone with local server access can log onto a machine and update the Local Administrators group as needed. Now it’s time for a security audit and you have to report which machine has what users and groups. This because a pain and tiresome.
From: checkyourlogs.net
This second approach uses a GPO "Preference" with variables so that any user who is added to a security group named COMPUTER_NAME Administrator will become an administrator on that specific computer only. The original post (quoted above) actually implements a stricter policy that ensures that only those users who are explicitly set via GPO will become local admins, this ensures that a user cannot "delegate" his local admin privileges to other users. We're not so concerned about this so we implemented a simplified approach:
Computer Configuration → Preferences → Control Panel Settings → Local Users and Groups
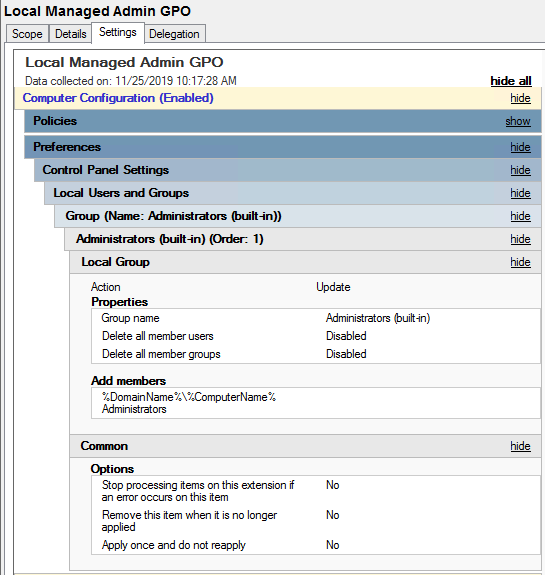
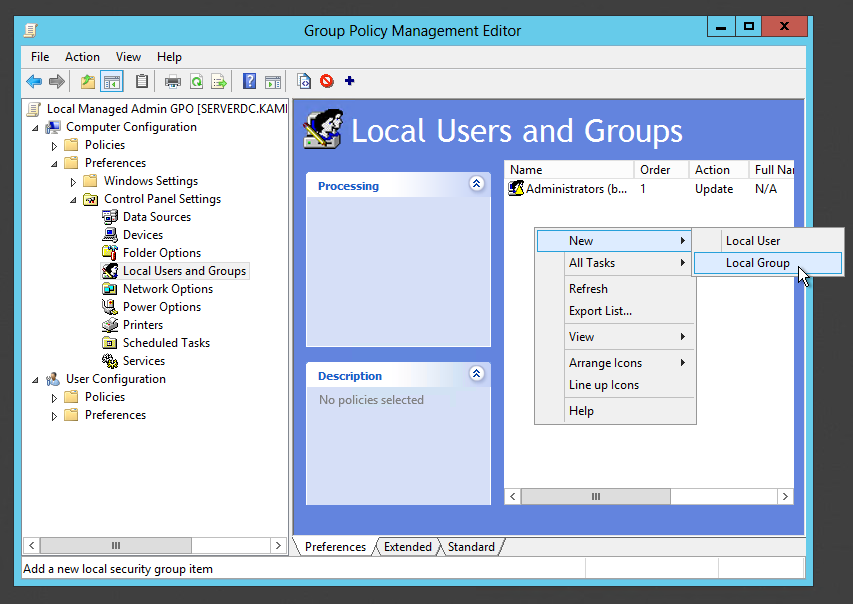
Add a group as follows.
Group name: select "Administrators (built-in)" from the drop-down list
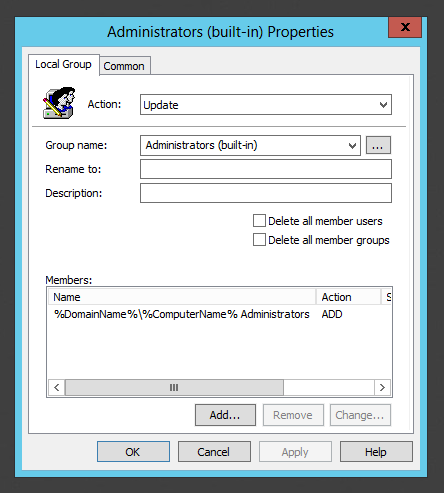
Members: add "%DomainName%%ComputerName% Administrators" as a member
Do not click "Delete all member users" or "Delete all member groups" (unless you really want that!)
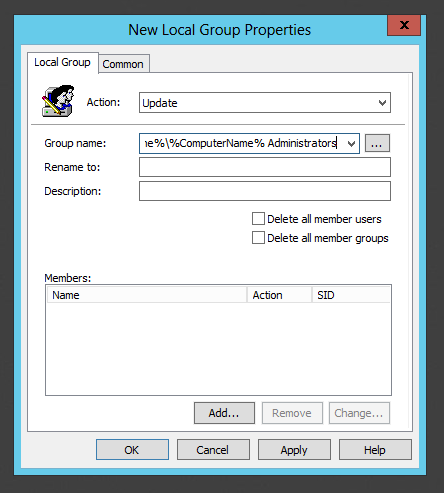
Your new group should look like this:
Now if you create a security group named "MACHINE_NAME Administrators" (in the Active Directory Users and Computers console), and add the given computer's user to the group, then that person will become an administrator on the given machine (after running gpupgate /force on the target machines and logging off and back on).

(2b) Using restricted groups
An alternate and more rudimentary method to achieve the above would be to create separate GPO objects for each computer.
Then for each workstation's GPO you would have two entries in the restricted groups:
DOMAIN\ITGroup → Member of →BUILTIN\Administrators
DOMAIN\Computer1 → Member of→ BUILTIN\Administrators
from SpiceWorks
Read Richard Skinner's blog entry for a rundown of this approach or How To Add Local Administrators via GPO (Group Policy)
Verifying Your Group Policy Works
- Login to any server in the OU you applied the policy to
- Open up a command prompt or Powershell Window
- Type GPUpdate /force
- Check Local Adminstrators Group and you group should be added
From: How To Add Local Administrators via GPO (Group Policy)
