
I use a two-pronged approach to back up up my Ubuntu Linodes:
- I use Linode's own backup service
- Duplicati to back up specific directories & mysqldump of my databases to Backblaze B2
For an overview of my backup strategy, as well as alternative software and solutions, see my post "Backing up a Headless Ubuntu Web Server (to Cloud & QNAP NAS)".
Install Duplicati on Ubuntu 20.04
This is well documented on Duplicati's docs (with some slight mistakes), which may well be more up-to-date than this blog post, so I suggest you follow that. Here's what I did:
(1) Install Mono & required packages
sudo apt-key adv --keyserver hkp://keyserver.ubuntu.com:80 --recv-keys 3FA7E0328081BFF6A14DA29AA6A19B38D3D831EF

# For 18.04:
echo "deb https://download.mono-project.com/repo/ubuntu stable-bionic main" | sudo tee /etc/apt/sources.list.d/mono-official-stable.list
# For 20.04:
echo "deb https://download.mono-project.com/repo/ubuntu stable-focal main" | sudo tee /etc/apt/sources.list.d/mono-official-stable.list

sudo apt update

sudo apt install mono-devel gtk-sharp2
# or alternatively do: sudo apt install mono-complete

sudo apt install apt-transport-https sudo nano git-core python software-properties-common dirmngr
Download Debian .deb file from https://www.duplicati.com/download https://github.com/duplicati/duplicati/releases:
wget https://github.com/duplicati/duplicati/releases/download/v2.0.5.111-2.0.5.111_canary_2020-09-26/duplicati_2.0.5.111-1_all.deb
apt install ./duplicati_2.0.5.111-1_all.deb
Replace the directory and filename with current versions!
Create the service:
sudo vi /etc/systemd/system/duplicati.service Paste the following:
[Unit]
Description=Duplicati web-server
After=network.target

[Service]
Nice=19
IOSchedulingClass=idle
EnvironmentFile=-/etc/default/duplicati
ExecStart=/usr/bin/duplicati-server $DAEMON_OPTS
Restart=always

[Install]
WantedBy=multi-user.target
Also set daemon options:
sudo vi /etc/default/duplicatiSet it to:
# Defaults for duplicati initscript
# sourced by /etc/init.d/duplicati
# installed at /etc/default/duplicati by the maintainer scripts

#
# This is a POSIX shell fragment
#

# Additional options that are passed to the Daemon.
DAEMON_OPTS="--webservice-interface=any --webservice-port=8200 --portable-mode"
Enable and start the service:
sudo systemctl enable duplicati.service
sudo systemctl daemon-reload
sudo systemctl start duplicati.service
sudo systemctl status duplicati.service
Enable remote access to your Duplicati UI through Putty
Duplicati runs a web server listening on port 8200. If you use Putty to connect to your server, you can set Putty up to create a tunnel when you connect to your node. This is quite secure as only you will be able to access the Duplicati UI when you've logged into your node.
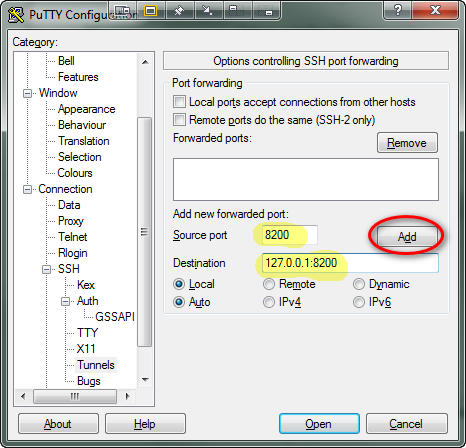
Click "Add"!

And save your Putty profile.
Now, you should be able to access your Duplicati instance once you've logged into your server with Putty:
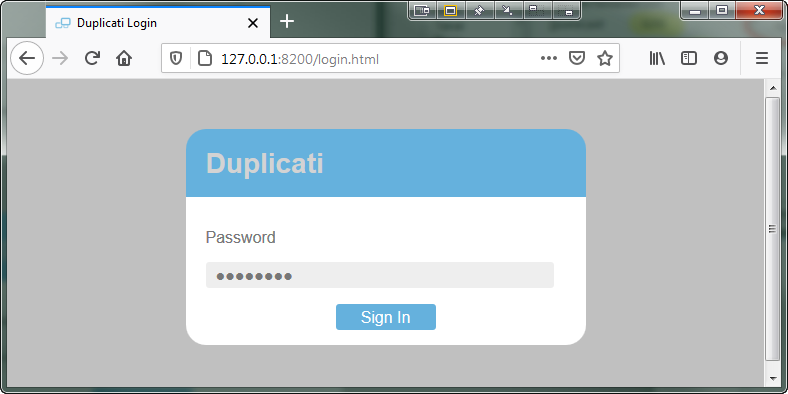
(if it asks you for a password, go ahead and set one up).
Note: 0pen http://127.0.0.1:8200, NOT http://127.0.0.1:8200/login.html!
If you can't access Duplicati's web interface, try to re-connect with Putty. Apparently Putty only creates the tunnel if a service is already listening on the remote end at the time that the connection is made.
Allow Duplicati through your Firewall
A more convenient solution is to allow Duplicati through your firewall. Do this only if you're on a fixed IP address - you don't want to expose Duplicato to everyone.
If you use UFW like I do this is simple enough:
sudo ufw allow from 111.222.333.0/24 to any port 8200 proto tcpIf you have a fix IP address you can specify that, or a subnet as I did. See How To Set Up a Firewall with UFW on Ubuntu 14.04 for help on setting up and using UFW.
Sign up to Backblaze
You can use any other cloud provider that Duplicati supports, I chose Backblaze because it's cheap with straightforward pricing, fast, and easy to use.
Once signed up:
- Create a "bucket" for your backups
- Create a new "App Key" (note the app ID and key, you will need them later)
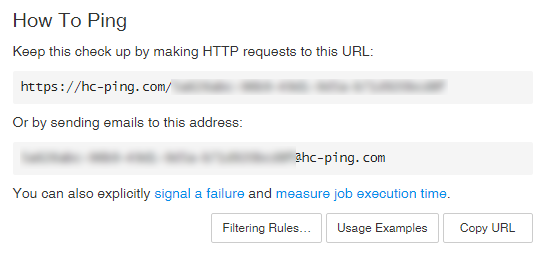
Sign up to Healthchecks.io
After signing up, create a new check. Make note of the email ping address that you can use to let healthchecks know that your backup succeeded ("How to Ping"):
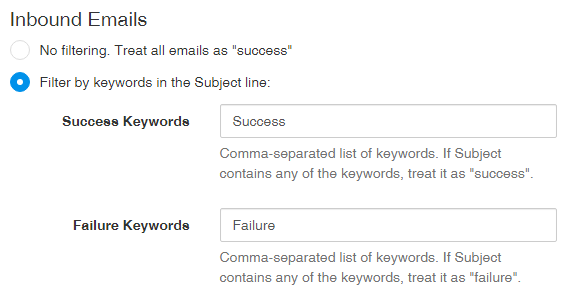
You can also click Filtering Rules... and add the following:
Configure Email Notifiations with Duplicati
Go to Settings → Default Options, click Edit as list and enter:
--send-mail-from=Duplicati <sender@address.com>
--send-mail-to=recipient@mailbox.com
--send-mail-level=all
--send-mail-body=%RESULT%
--send-mail-password=SMTP_PASSWORD
--send-mail-subject=%PARSEDRESULT%: Duplicati %OPERATIONNAME% report for %backup-name%
--send-mail-url=mail.your-mail-server.com
--send-mail-username=sender@address.com
of course, replace example strings above as necessary. You can click Edit as list to go back to list view, which includes hints on how to configure the above variables.
If using ufw, allow outgoing mail (adjust ports as needed):
sudo ufw allow out 587If you get erros like "Failed to send message: MailKit.Security.SslHandhsakeException: An error occurred while attempting to establish an SSL or TLS connection" then a solution is to add the following option to the backup settings (or the general settings):
--accept-any-ssl-certificate=trueBack up WWW
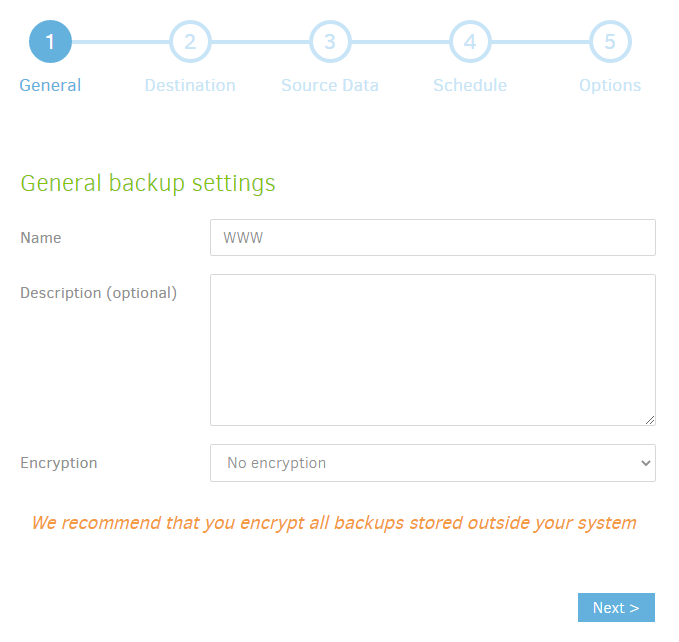
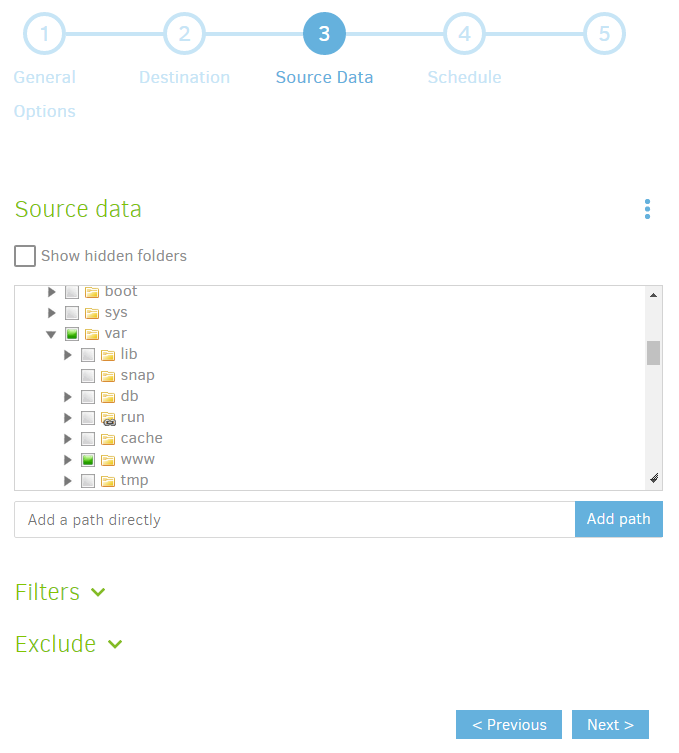
You can back up whatever you want, but I started with WWW. Click Add backup, and then:
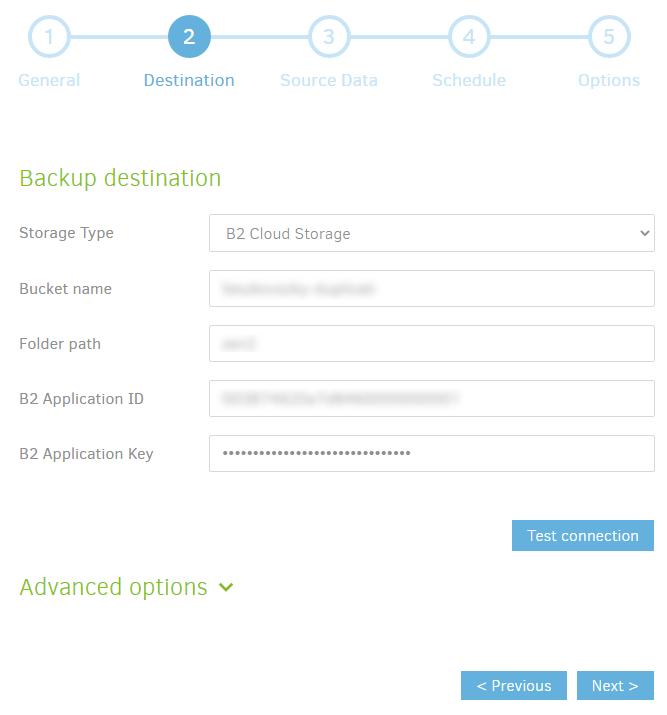
- Your "Bucket name" must be the name of one of your buckets set up in Backblaze
- The "Folder path" can be anything you want, such as "my-linode-backup"
- The B2 App ID and Key you get when you create a new "App Key" in Backblaze
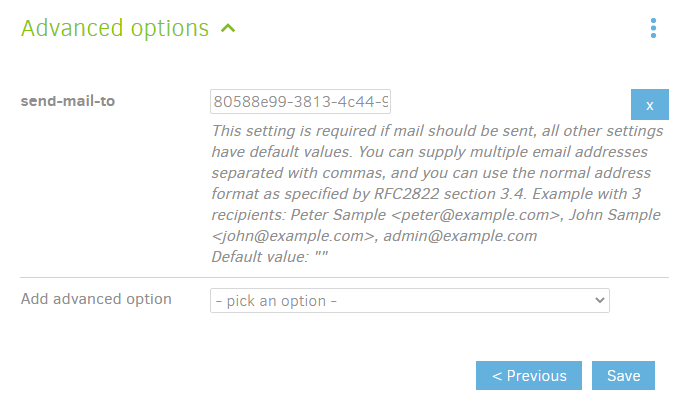
Configure your schedule as you wish in step 4
In step 5, add "send-mail-to" advanced option, and set the "send-mail-to" to the "ping address" for your healthchecks.io check.
Verify!
Now, if you manually run your backup:
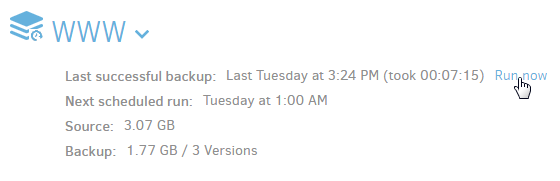
You should see that your healthchecks.io check was "pinged". You should set your healthchecks.io check period to match the backup schedule you set for your Duplicati job.
Back up MySQL
You can use various methods to back up your MySQL, you could even try to just shut down your database and make a backup of your MySQL data dir. But from my research it seems that the best path is to use mysqldump to create a backup of your database in the local filesystem, and back up that folder.
First, create a dedicated MySQL user and give it PROCESS privileges. Then, create a script in your user profile, dump_mysql.sh:
#!/bin/bash
mysqldump --defaults-extra-file=<(printf "[client]\nuser = %s\npassword = %s" "root" "YOUR_PASSWORD") --all-databases 1> /home/YOUR_LOGIN/backup/mysql/mysql.sql 2> "$(date +/home/YOUR_LOGIN/backup/log/dump_mysql_%Y-%m-%d_%H-%M-%S.log)"
exit 0
A drawback is that you are storing your mysql pw in clear text in the script. You could take steps to get around this. The script also outputs any errors to a log directory. chmod to make the script executable, and create your target backup directory if it doesn't exist:
cd ~
sudo -uwww-data mkdir backup
cd backup
sudo -uwww-data mkdir mysql
sudo -uwww-data mkdir log
sudo -uwww-data vi dump_mysql.sh
... edit the file and save ...
sudo chmod ug+x ./dump_mysql.sh
... create the necessary database users and test:
sudo -uwww-data ./dump_mysql.sh
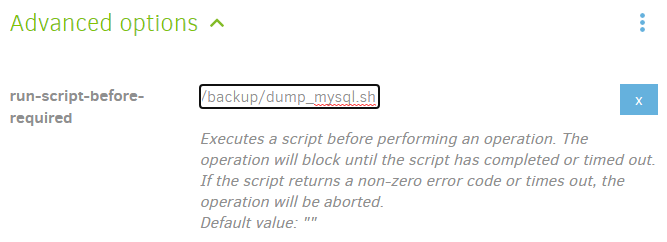
... check the output of the latest log file in ~/backup/logThen, set this script to run before my backup in Duplicati (edit the job, on step 5, add a run-script-before-required advanced option:
Back up Jira
If you run your own jira (which, it seems, Atlassian plans to stop supporting), then you can use the built-in backup utility that comes with Jira, or just back up your Database and attachments manually. The latter will make a recovery more difficult, but it's easier to configure, and the resulting backup runs faster and takes up much less space since you'll only be saving changes as opposed to all of your jira data on each backup run.
In my case, in addition to my database this is all I need to back up my Jira attachments:
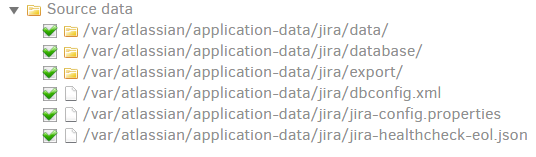
To make sure your jira is in a consistent state, I recommend stopping jira before the backup and starting it back up afterwards. This is simple enough. Create a stop_jira.sh script somewhere (I chose my /home/my_username/backup directory) and paste the following:
#!/bin/bash
sudo systemctl stop jira.service &> "$(date +/home/laci/backup/log/stop_jira_%Y-%m-%d_%H-%M-%S.log)"
exit 0
also create a start_jira.sh script:
#!/bin/bash
sudo systemctl start jira.service &> "$(date +/home/laci/backup/log/start_jira_%Y-%m-%d_%H-%M-%S.log)"
exit 0
Also make it executable!
You will probably need to allow your user to run the systemctl commands in the above files without reauthentication, for this we can follow one of the approaches described in Ubuntu – How to start and stop a systemctl service inside a bash script:
sudo visudo -f /etc/sudoers.d/MYUSERNAMEThen paste:
Cmnd_Alias JIRASERVICE = \
    /bin/systemctl stop jira.service, \
    /bin/systemctl start jira.service

MYUSERNAME ALL = (root) NOPASSWD: JIRASERVICE
Replace "MYUSERNAME" with your linux username in the above commands. This way your user can run sudo systemctl start jira.service without manual authentication.
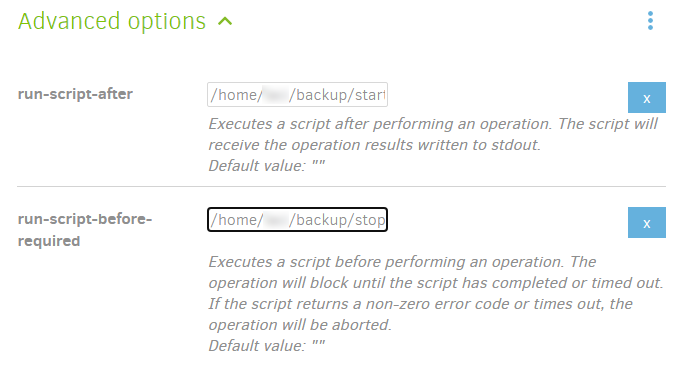
Now, in your duplicati job, add run-script-before-required and run-script-after options:
Back up GitLab
GitLab has an extensive backup solution built in. You can configure that or keep it simple and just create a filesystem-based backup. Read the "Alternative backup strategies" section in the GitLab docs. Like with Jira, this is easier to set up, runs faster, and takes up much less space than having GitLab create backup files and backing that up. Users have reported success restoring GitLab from a backup of two important directories:
- /var/opt/gitlab
- /etc/gitlab
To make sure your GitLab is in a consistent state, I recommend stopping it before the backup and starting it back up afterwards. Create a stop_gitlab.sh script somewhere (I chose my /home/my_username/backup directory) and paste the following:
#!/bin/bash
gitlab-ctl stop &> "$(date +/home/YOUR_LOGIN/backup/log/stop_gitlab_%Y-%m-%d_%H-%M-%S.log)"
exit 0
also create a start_jira.sh script:
#!/bin/bash
gitlab-ctl start &> "$(date +/home/YOUR_LOGIN/backup/log/start_gitlab_%Y-%m-%d_%H-%M-%S.log)"
exit 0
Also make it executable!
Now, in your duplicati job, add run-script-before-required and run-script-after options like we did with Jira above (step 5, advanced options).
Issues
Backup starts failing with message "CERTIFICATE_VERIFY_FAILED"
Solution is to add the "accept-any-ssl-certificate" option to the given backup.
Manually Upgrading
Duplicati notifies you on the web UI if an update is available and you can usually install the update from there. In some versions this functionality is broken, you can then just install the latest version as follows:
xxx@www:~$ wget https://github.com/duplicati/duplicati/releases/download/v2.0.6.100-2.0.6.100_canary_2021-08-11/duplicati_2.0.6.100-1_all.deb
xxx@zensoft:~$ sudo apt install ./duplicati_2.0.6.100-1_all.deb
Find the latest release from https://github.com/duplicati/duplicati/releases
